DIY Dollar Tree Vinyl Storage
- Ashleigh

- Nov 21, 2020
- 2 min read
Before my big bundle of vinyl arrived, I started to research a both cost and space effective way for me to store my vinyl. I live in a two bedroom apartment, so finding a way to keep my small craft corner organized and away from little baby hands was a MUST.
Over the past few months, Dollar Tree has become my new best friend.
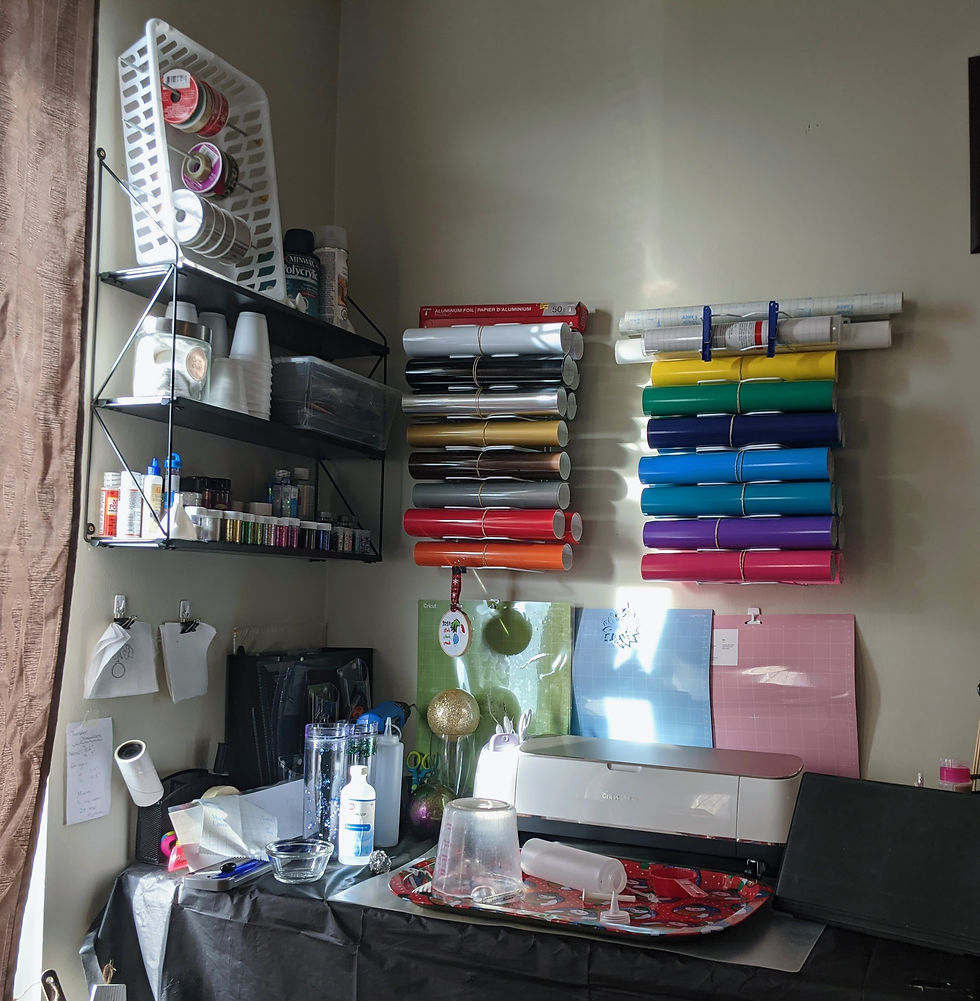
So how did I turn a Dollar Tree dish rack into this?

In order to make these racks, there are just a few supplies that you need.
4 Dollar Tree Dish Racks (purchased from Dollar Tree)
White (Clear) Zip Ties (purchased from Dollar Tree)
A package of Binder Clips (purchased from Dollar Tree)
*Optional* A package of Clothing Pins (purchased from Dollar Tree)
A package of 1/2″ Plastic U Straps (purchased from Canadian Tire)
Instructions:
1. Using the zip ties, you want to line up two of the dish racks and zip- tip them together. One zip tie on each side and one connecting them in the middle. Once all your zip ties are placed, trim them and then turn them inward so that the knobs are not facing out. Be sure to do this, so you don’t risk damaging your vinyl.

2. Use two of the Plastic U-Straps to fasten the racks to the wall on either side. Make sure that you use a stud finder prior to find a strong spot and to ensure that you will not nail through any electrical wires.

3. After you have measured and attached your first rack to the wall, make sure that you measure to ensure the proper spacing and even height between your two racks. I left a 12″ space between my racks to ensure that they did not touch when the vinyl rolls were inserted. Don’t forget to use a level to make sure they are the same height on the wall! Use a pencil to mark where you want your second rack to go.
4. Complete the first two steps with your second rack and VOILA! You’re done!

Once you have your racks set up, you can start filling them with your vinyl. I order my vinyl in 12″x12″ sheets, so I roll them up myself and fasten them with a rubber band to make sure they don’t unroll. You can typically fit two rolls in each “shelf”. For my larger rolls, I clipped binder clips to the rack with their wings facing outwards (as seen in the image above) to prevent the rolls from rolling or popping out.
OPTIONAL: You can also use clothing pins, you just have to slide the tops under the bar above before you clip them to the bar below. Like so:
I use clothing pins to hold in my transfer tape because then it is super easy to slide in and out. These clothing pins were purchased from Dollar Tree as well.

Happy Crafting!


Comments