Layering Vinyl
- Ashleigh

- Nov 24, 2020
- 3 min read
Tonight I completed my first custom order, yay!! When my customer contacted me, she sent me some screenshots of the ideas that she had in mind for her ornaments. The ornament that I completed was inspired by what she sent, but the design was created by me in Cricut Design Space.
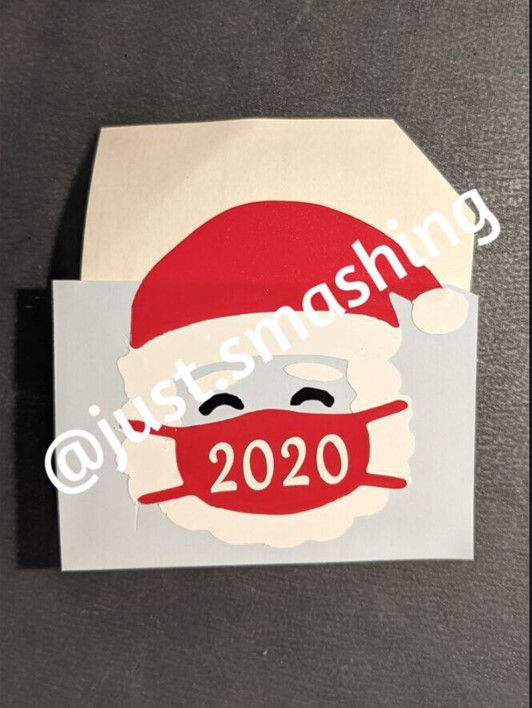
For those who don't know, in order to create vinyl images with multiple colors, you must cut each piece with the corresponding color and layer it by hand. This has been a steep learning curve for me, as I am still new to the Cricut crafting scene. This is what my layers looked like once I cut them and weeded out any unneeded vinyl.

Once I had my weeded pieces, I had to figure out the best order for them to be layered so that my Santa would have the cleanest look. On my first try, I picked up the white Santa beard piece first, that didn't work because it cut off the red lines of the mask. Luckily, I just had to recut the white portion, so it wasn't a mistake that cost me too much vinyl.
Layering vinyl takes a lot of practice, I'm not going to deny that I attempted this Santa three times and had to tweak my SVG (cutting file on Cricut Design Space) to get the look that I wanted. But, that's all a part of the fun and learning process! Before I started layering my vinyl, I grabbed a piece of wax paper. It gives you a clean surface to layer your vinyl, and once it's complete you lift it and place it on your project piece. For me, this was my ornament. However, when you create your cut designs in Cricut Design Space they are extremely versatile. Once you have your base design, you can modify the measurements to fit pretty much any item that you're wanting to work with like a mug, wine glass, t-shirt etc.
The laying for this ornament went as follows:
The red pieces. I used my transfer tape to layer them over top of the white beard pieces. The trickiest part of this was making sure that the mask straps covered the white edges in the beard. Once I was happy with my placement, I used my Cricut scraper to smooth it out on top of the parchment.
The eyes. I picked them up with the transfer tape and repeated the same process as above. Found my placement, stuck my vinyl, smoothed out the design, and then peeled back the transfer tape.
The year. Lifted it with my transfer tape and placed it over the red mask piece. I had to make sure it was straight because the Santa face is slightly curved.
Once I had all my pieces placed, I covered the entire image with my transfer tape and smoothed it out. It looked like this:
Before I place my vinyl, I always ensure to wipe the surface with rubbing alcohol and let it dry. This makes sure the surface is clean so you don't have any specs underneath your vinyl (or rouge glitter). I then lifted the entire image and placed it on my pre-glittered ornament. The ornaments that I choose to work with have a flat surface, I just find that they work perfectly for laying vinyl. Make sure to remeasure your ornament and mark the center before you place your vinyl. You only get one shot at placing your vinyl because once it sticks to the surface, you risk damaging the cut if you try to peel it off. If you do make a mistake, don't worry, you can pull off the vinyl. It takes some effort, but it will come off. If you pull it off, you will most likely have to recut and re-layer your images. Once you have your center marked, go ahead and lay your image pressing the middle parts down first. If you're having issues getting your image to lay flat around any curves, try cutting small slits in your transfer tape. This will allow you to pull your transfer tape tight limiting any chances of air bubbles or ridges in your vinyl.
Once I was happy with my placement, I smoothed it out with my fingers, peeled back the transfer tape, and voila! Quarantine Santa was complete...

If you have any questions about layering vinyl or Cricut Design Space, leave a comment below!
Happy Crafting & Happy Holidays!


Comments